My Year in Food Pics

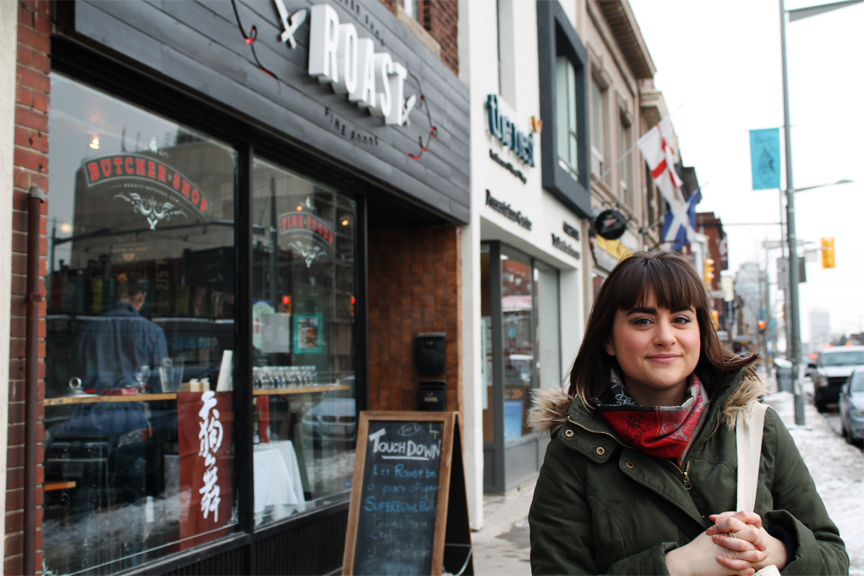
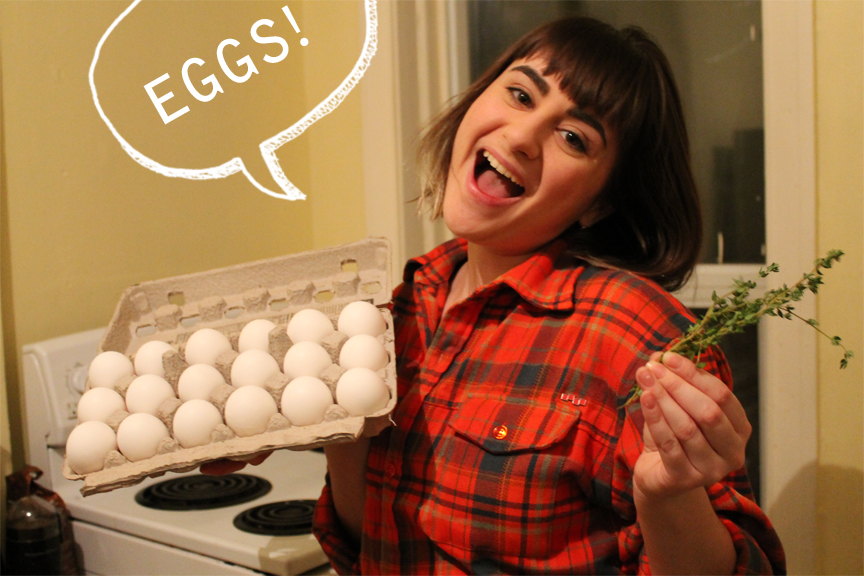
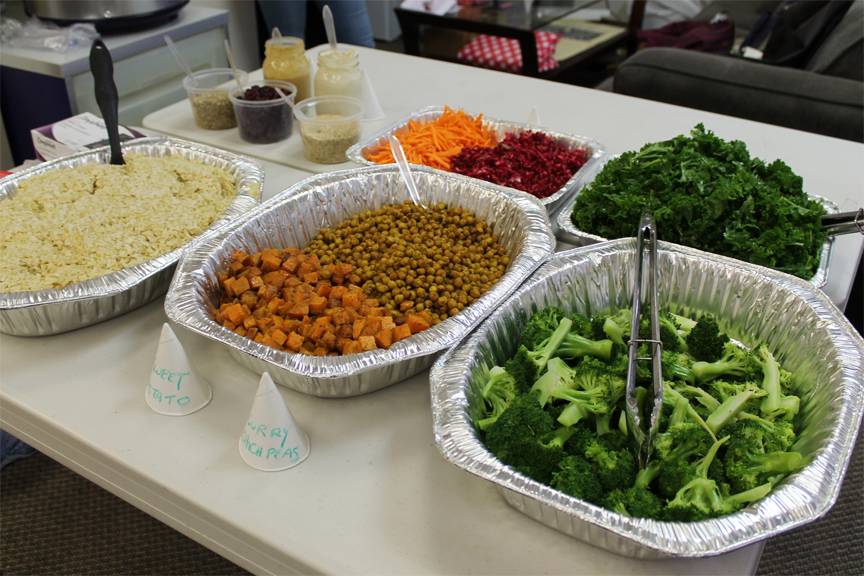
Now that culinary school has come to an end, I just wanted to share some photographs of food I made both at school and at home over the past year or so. Some photos are from before I even started chef school, and they continue right up to the day just after I finished. Last weekend my friend Rianna and I catered for a charity event where we made a build you own vegan buddha bowl buffet, and it was so much fun! Before attending culinary school I would have never expected I would be able to cook for so many people out of my tiny kitchen.

This experience has enriched me in so many ways. Yes, it did teach me how to create crazy difficult dishes that I never knew I as capable of. You want me to butcher and cook a whole rabbit, braise its legs, roast its saddle, make whole wheat pasta, a pasta sauce, and a rabbit jus in three and a half hours? Sure, no problem! But culinary school also taught me discipline – how to wake up at five in the morning and be in class by seven, prepped and ready to go. It taught me how to be resilient and push through making mistakes and physical exhaustion. It toughened me up, and made me feel strong, competent, and confident in myself. Most of all, culinary school made me feel inspired, as the chefs I had the opportunity to learn from all exhibited so much passion and pride in their work that it was infectious. I am so grateful that I got to have this experience, and for all the awesome people I met who made it memorable. Cue photo time!

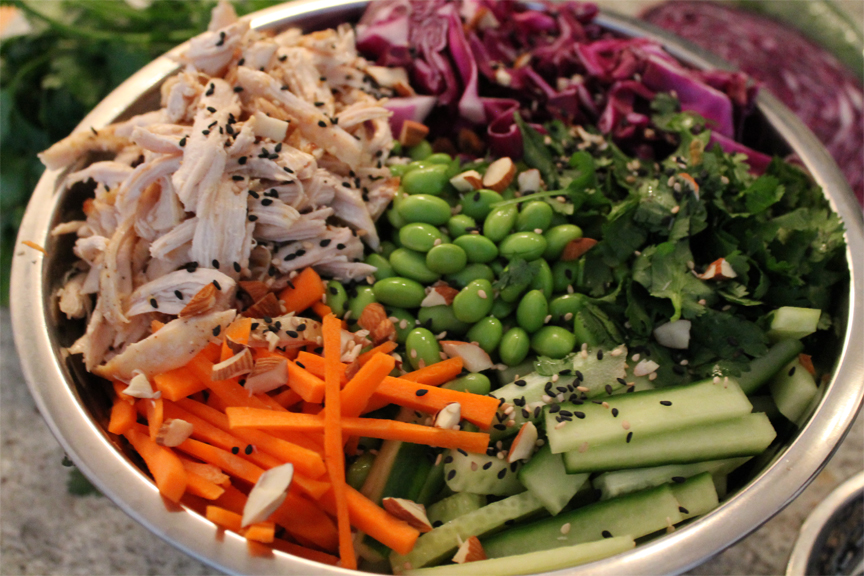
Our time travels take us back to May 2014. I had just recently applied to the culinary program at George Brown, and celebrated by making this fresh and colourful chicken salad. It’s like a bright and cheery rainbow in a bowl, with red cabbage, carrots, cucumber, edamame, almonds, black & white sesame seeds, and cilantro bulked out with romaine and doused in a tangy citrus dressing.

Crispy Asian Inspired Chicken Salad

#2May
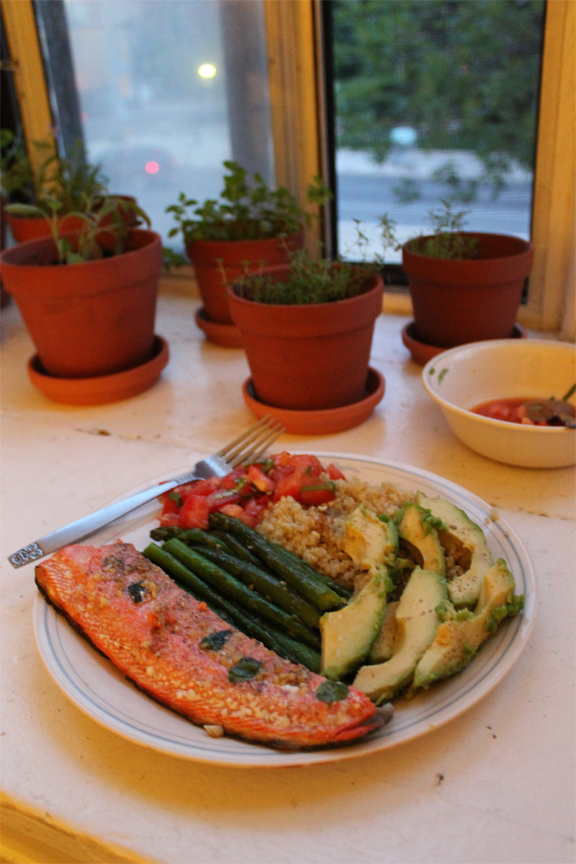
In September 2014, I had moved into my boyfriend’s apartment and we enjoyed a fresh late summer dinner of baked salmon, asparagus, quinoa, avocado, and a tomato & basil salad. The basil we grew ourselves from our bay window herb garden.

Salmon dinner with avocado and couscous
A late summer meal.

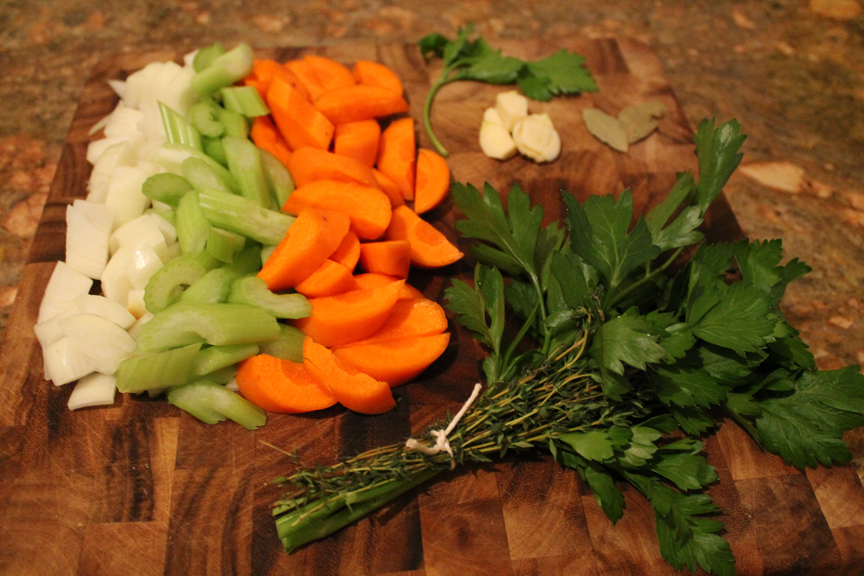
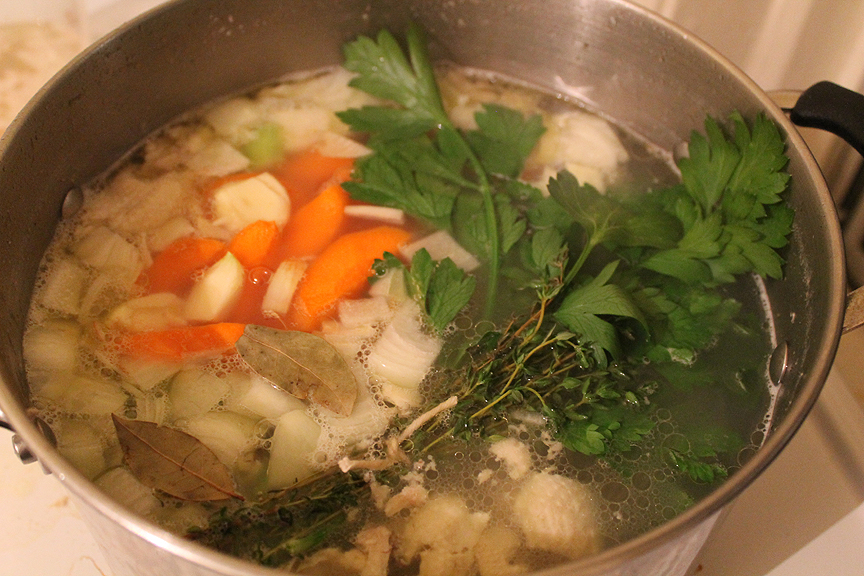
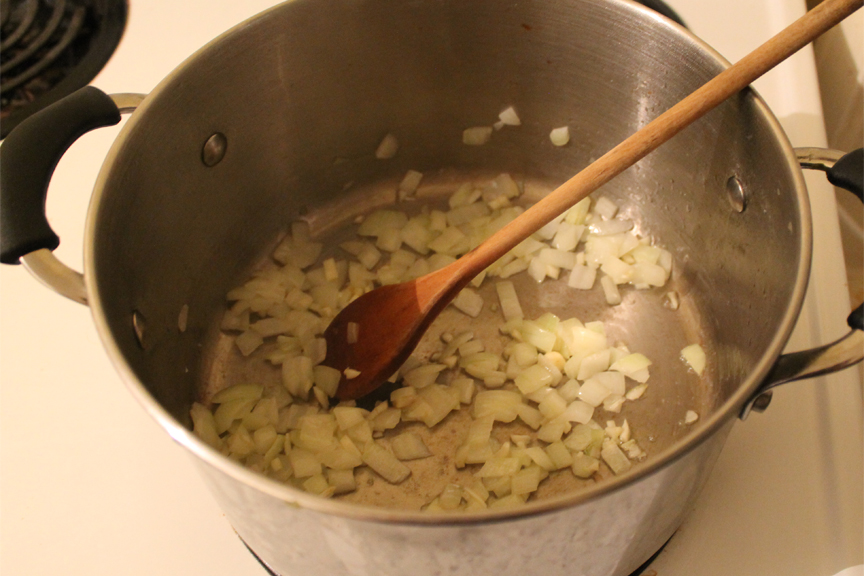
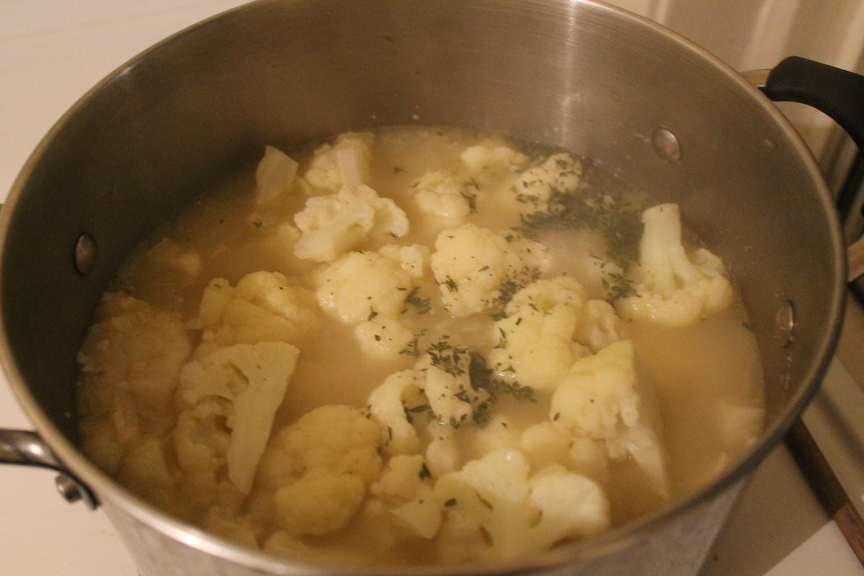
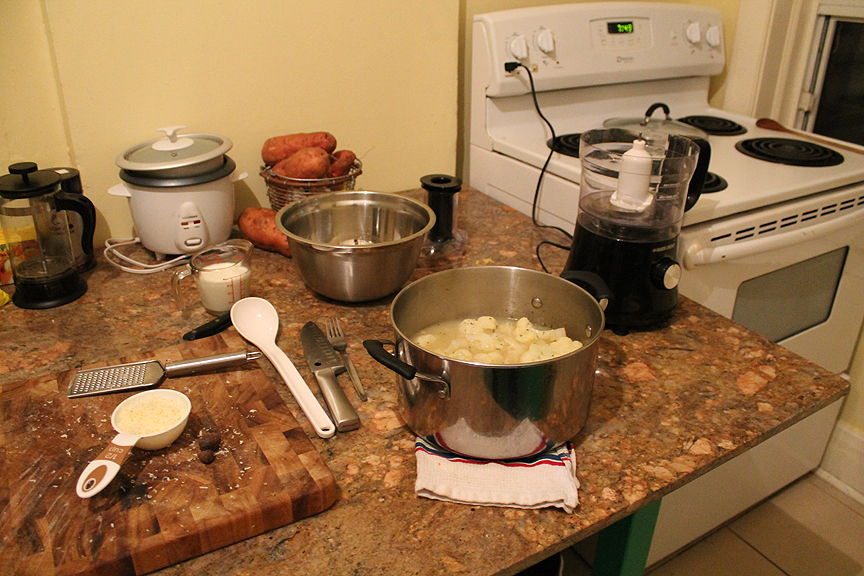
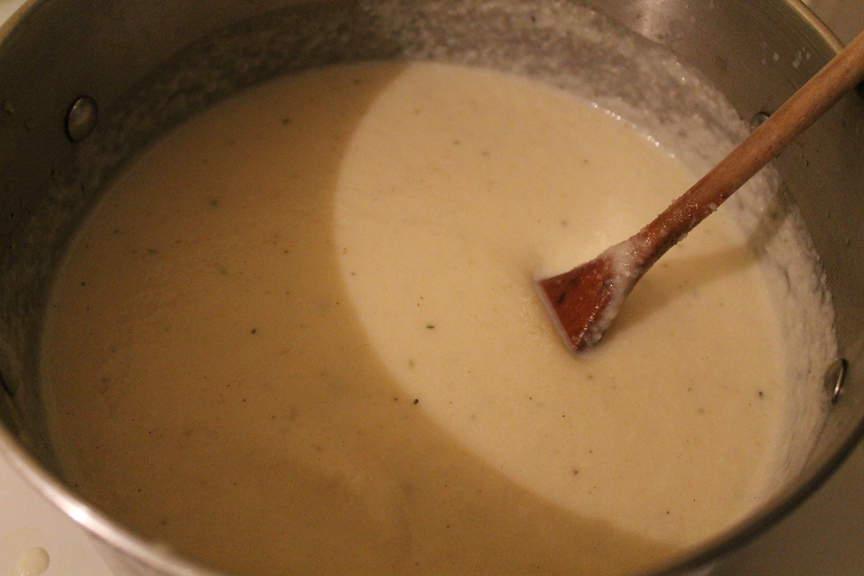
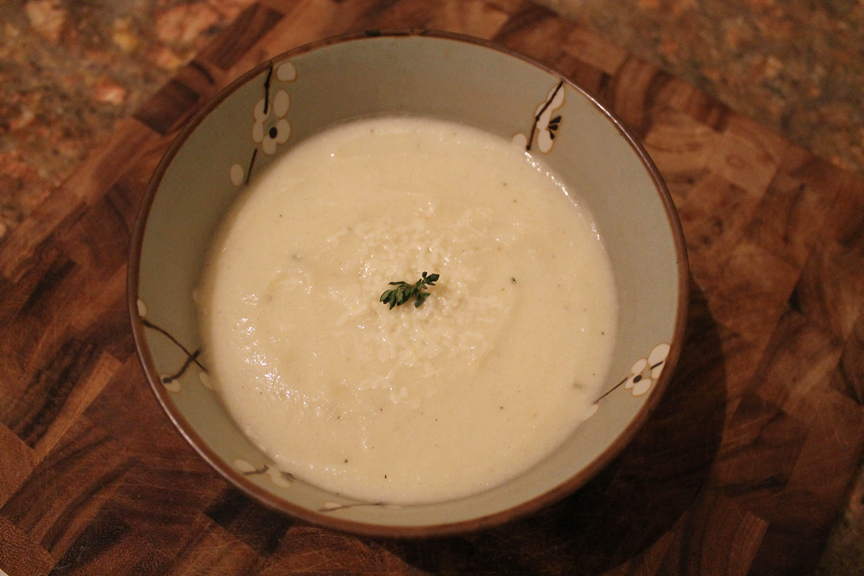
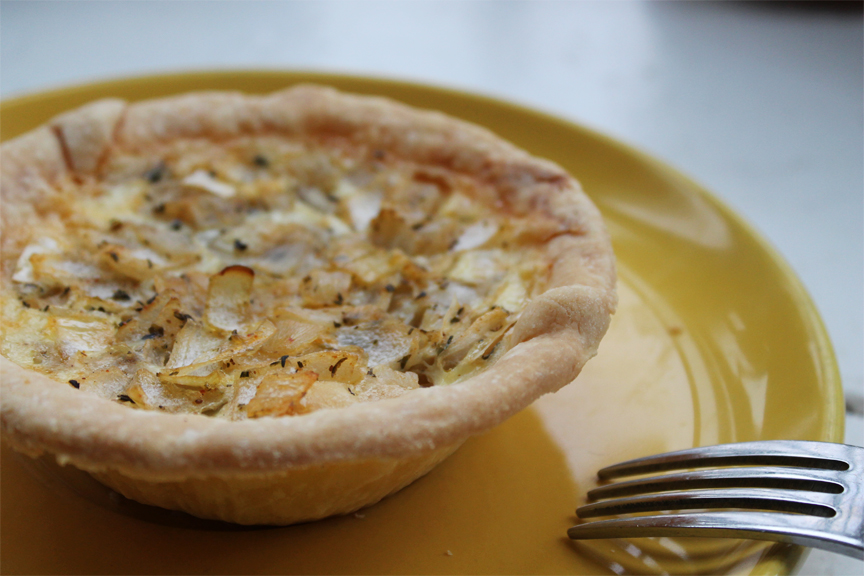
When I first started school I was in a class called Cafe Production, where we worked in teams in a large scale kitchen to produce food for the student run take out restaurant. But this was no ordinary take out food! For example, this rich and creamy mushroom soup made with porcini and portobello mushrooms.

Rich and creamy mushroom soup

I was so inspired after class that I would come home and start experimenting in my own kitchen.

Honey Dijon Chicken Thighs with Curried Butternut Squash & Rice, and a Broccoli, Apple and Kale Salad with a Creamy Yogurt Dressing
Honey Dijon Chicken Thighs with Curried Butternut Squash & Rice, and a Broccoli, Apple and Kale Salad with a Creamy Poppyseed Dressing.
Butter & Thyme Baked Tilapia,  Roasted Turnips and Beetroots, and Wilted Beet Greens with Basmati Rice
Butter & Thyme Baked Tilapia, Roasted Turnips and Beetroots, and Wilted Beet Greens with Basmati Rice.

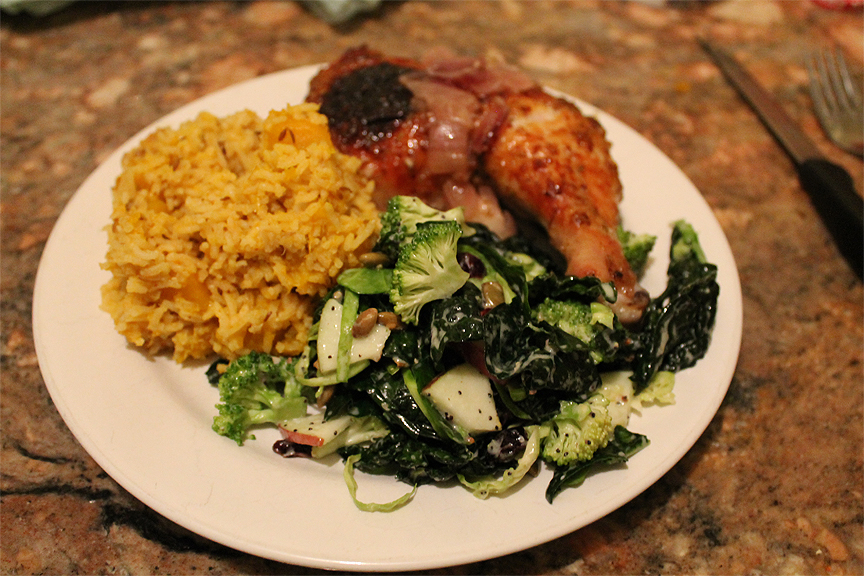
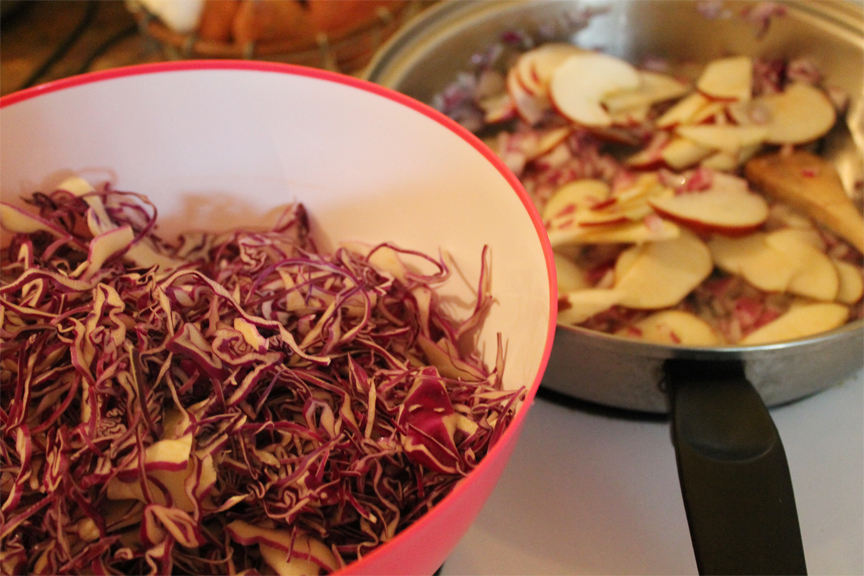
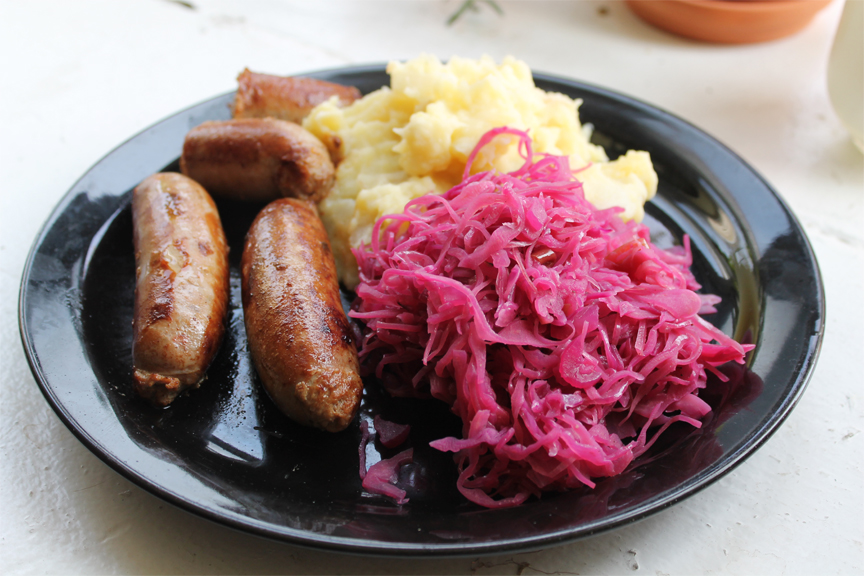
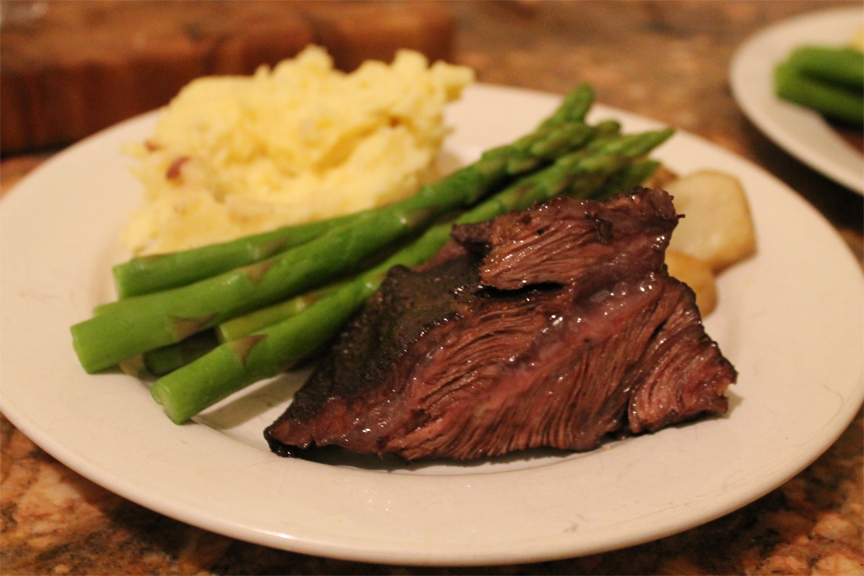
In October, and in the spirit of Octoberfest, I made a hearty meat and potatoes meal and served it with a side of Braised Red Cabbage, Onions, and Apples.

Braised Red Cabbage, Onion, and Apple
Making the Braised Cabbage.
Oktoberfest Feast
Oktoberfest Feast!

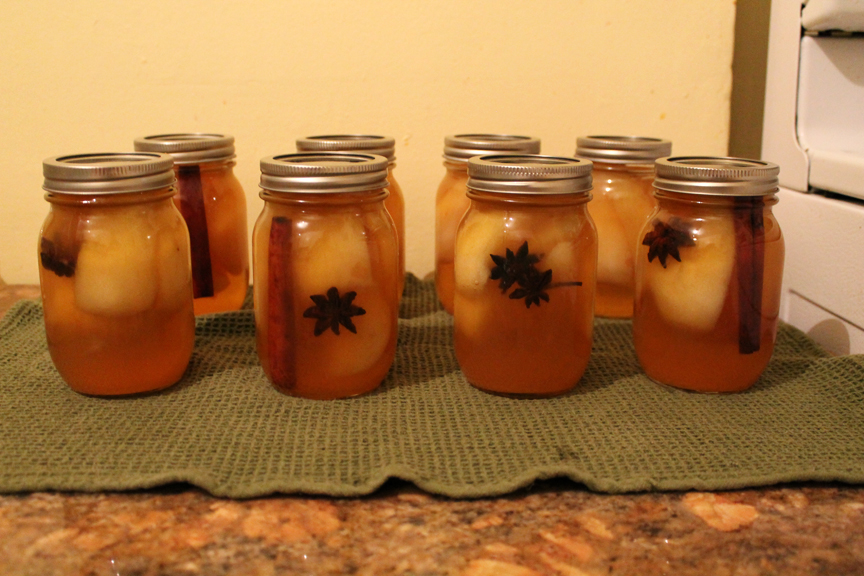
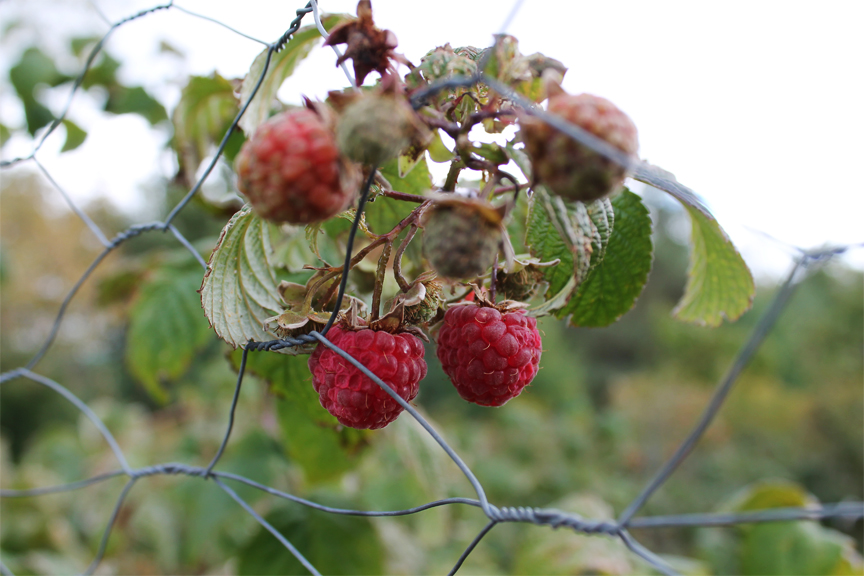
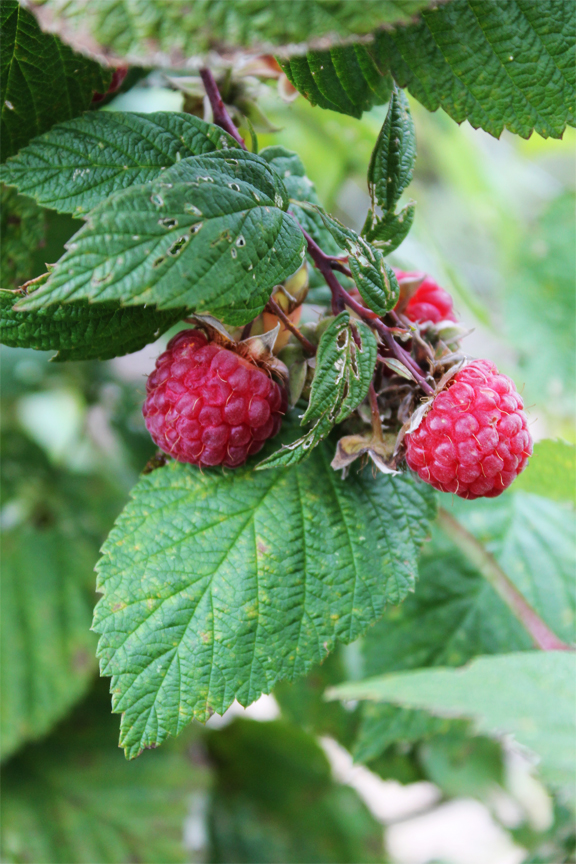
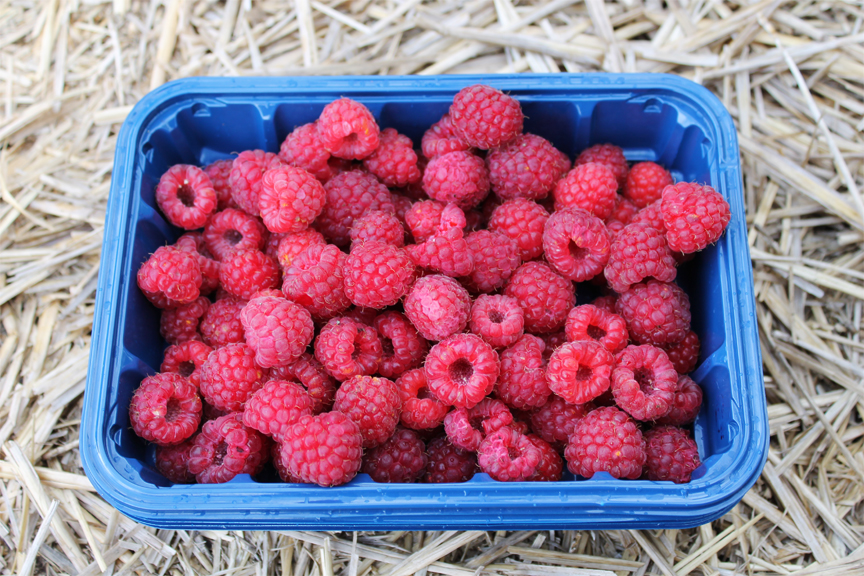
Also in October, I visited my parent’s country home in Cobourg for Thanksgiving. My mother is a bit of a gardening enthusiast, and her raspberries were ripe and ready to pick.

The raspberries were in season
The raspberries were in season.
Raspberry picking!
Raspberry picking!

Close up of raspberry

fresh picked raspberries
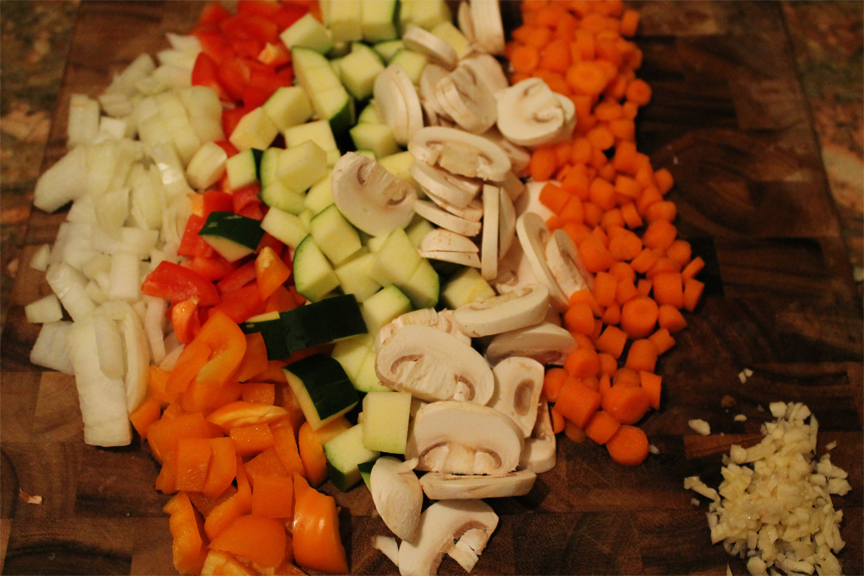
After the Thanksgiving holiday, Chef School continued and I worked on my knife skills.

veggies
Chopping away at some veggies for a spaghetti sauce.
Dicing away at some more roasted veggies to serve as a side dish.

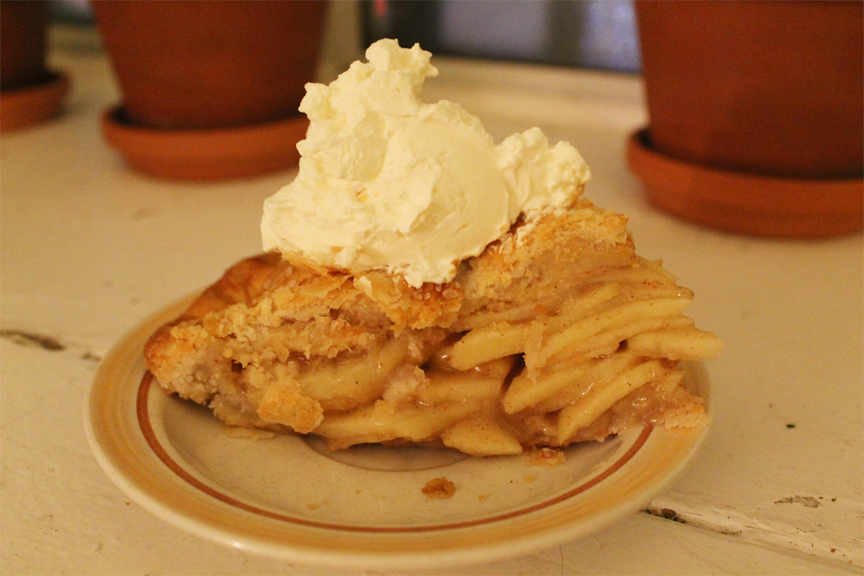
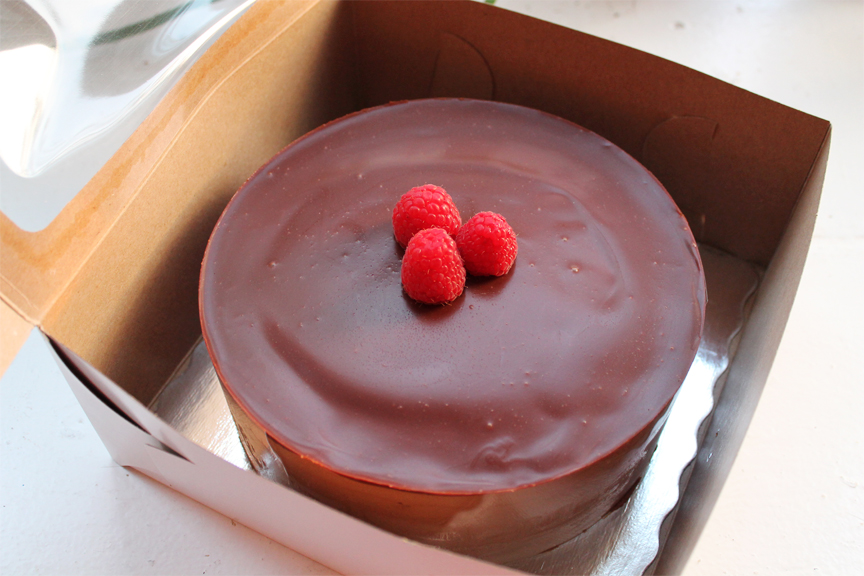
It was around this time that I also started my baking course at George Brown so I brought home so many indulgent pastries and desserts.

Eclairs and Creme Puffs
Eclairs and Profiteroles. These were probably the most difficult thing I have ever attempted to bake before! I also (almost) ate the whole box after to console myself with how hard the class was…
Buns
Cute little buns! Made into even cuter little sandwiches!
A very simple onion quiche made with fresh pastry dough
A very simple onion quiche made with fresh pastry dough.
The best damn Apple Pie I've ever eaten in my life
The best damn Apple Pie I’ve ever eaten in my life!
slice of apple pie
It was so flaky!
Little apple pockets made with from scratch puff pastry (another one of the most difficult things ever! But so rewarding, never had better pastry in my life before!)
Little apple pockets made with from scratch puff pastry (another one of the most difficult things ever! But so rewarding, never had better pastry in my life before!).
Chocolate Mouse Cake
Chocolate Mousse Cake
Lemon Custard Tart
Lemon Custard Tart

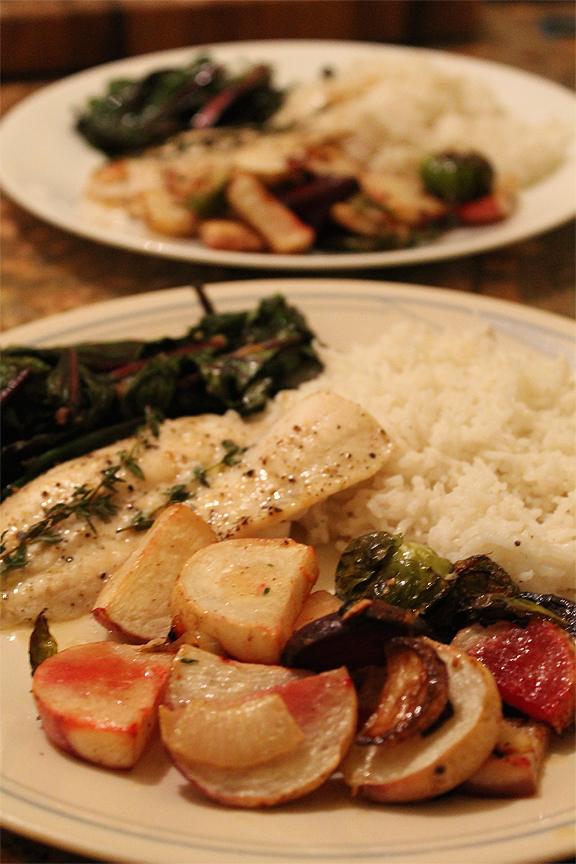
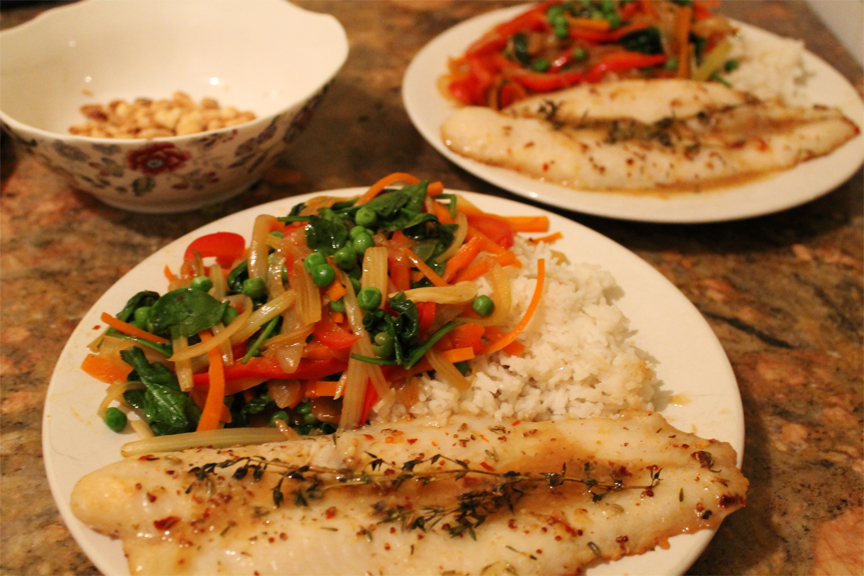
In December I continued to work on my knife skills, especially my julienne which I find the trickiest. For this dish I made a sweet and spicy Marmalade marinade for my white fish that I baked in the oven, and a quick stir fry with rice (if you haven’t noticed already, I eat a loooot of rice).

Working on the julienne!
Working on the julienne! Getting a bit better?
Sweet and spicy Marmalade marinade
Sweet and Spicy Ginger Marmalade Marinade

Stir fry!

Fish Dinner
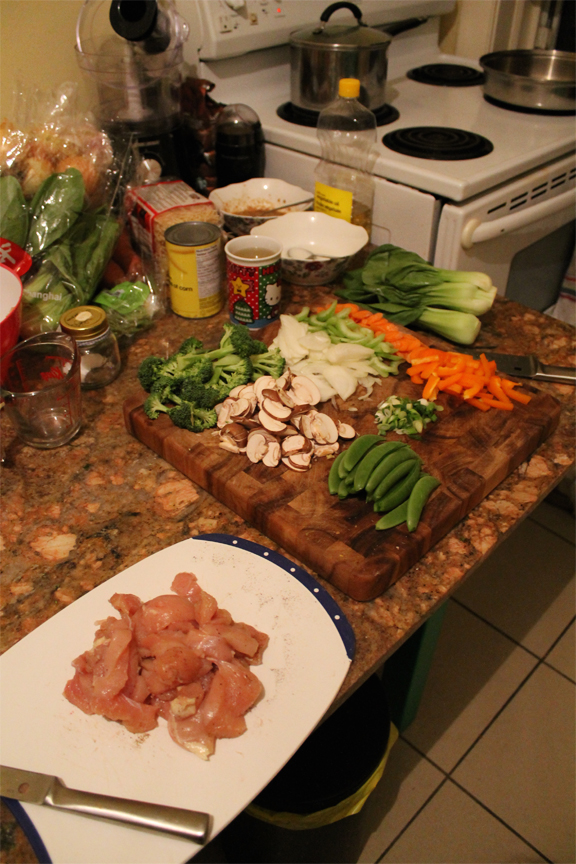
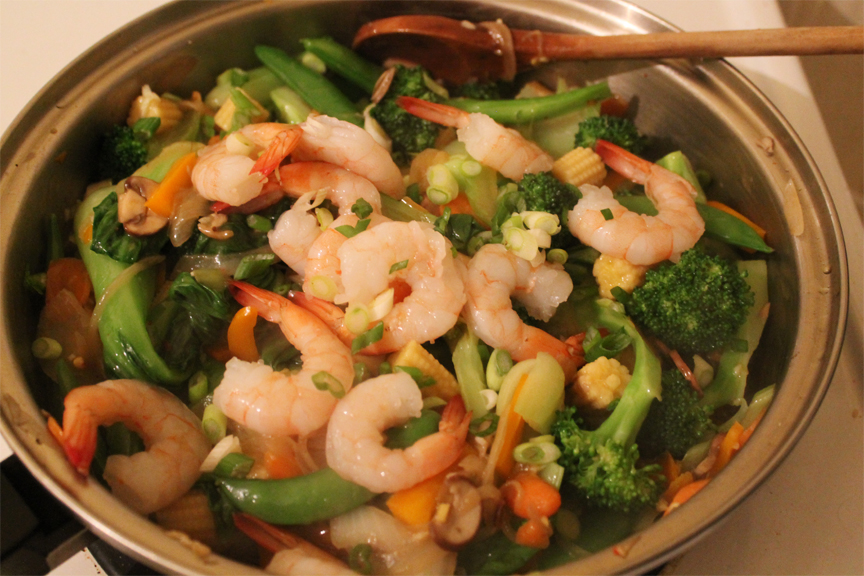
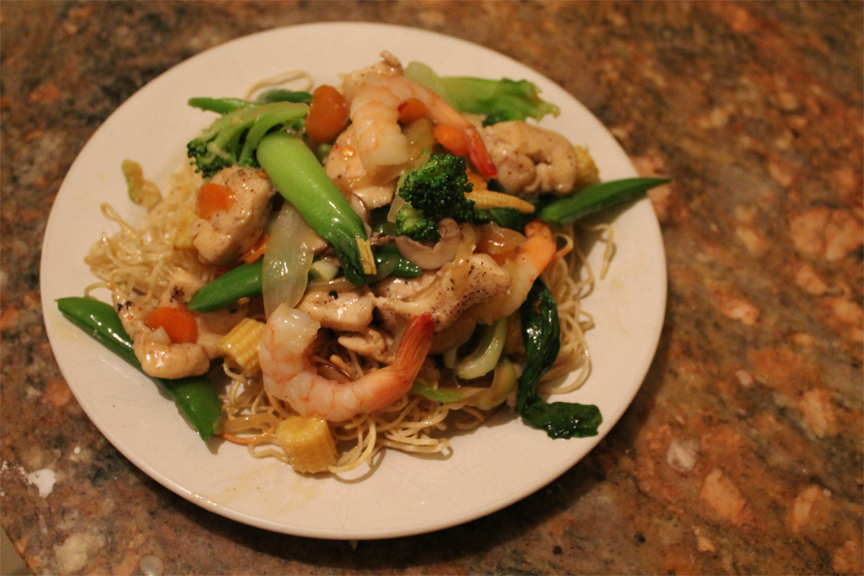
In  January I became obsessed with the concept of making take out recipes at home, especially my all time Chinese take-out favourite, Cantonese Chow Mein. Here I did a chicken and shrimp version.

Chopping and prepping all those vegetables!

Shrimp and Chicken Chow Mein

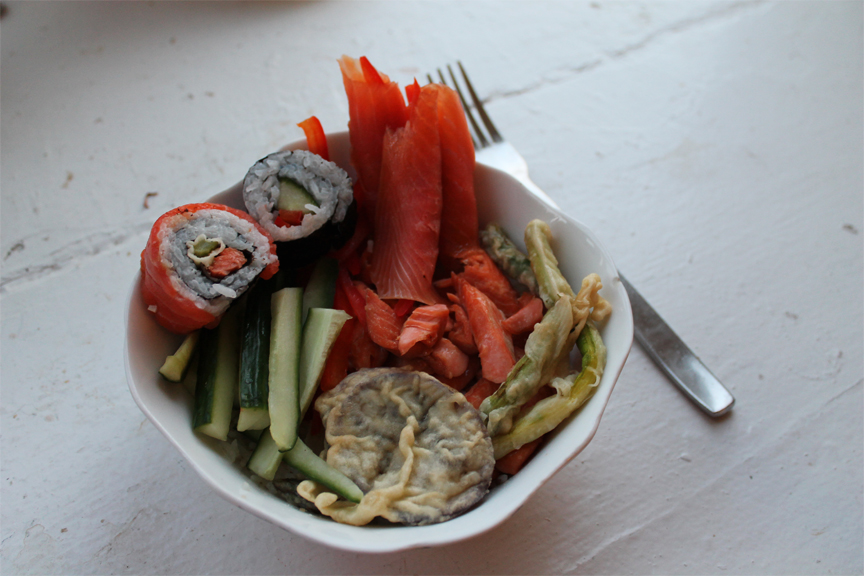
Fast forward to March, and I had started my Foods of the World class. Each week was a different country. Japan was my favourite, we made maki!
MakiPork tacos anyone?

Pork tacos
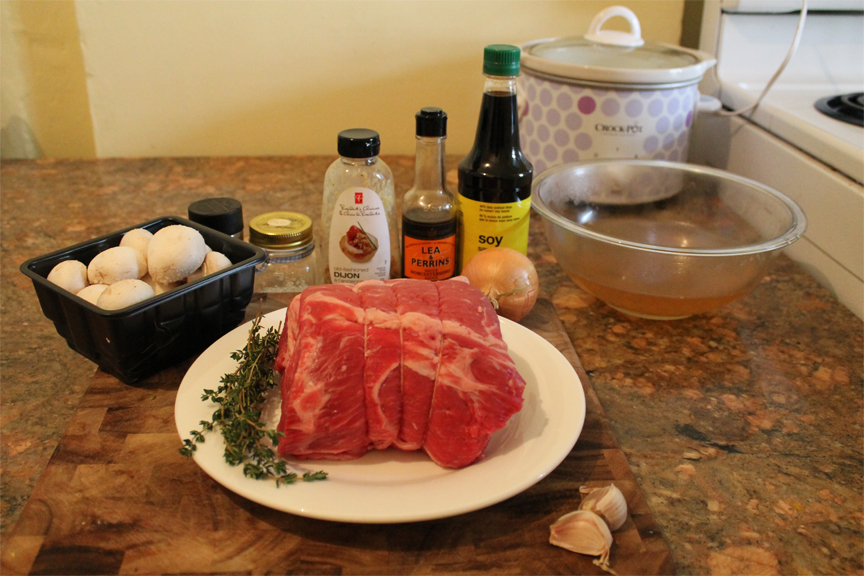
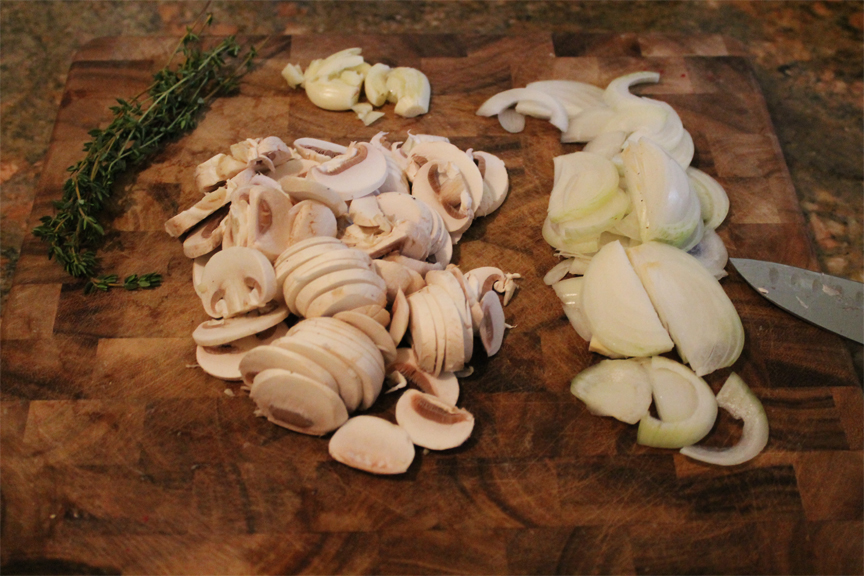
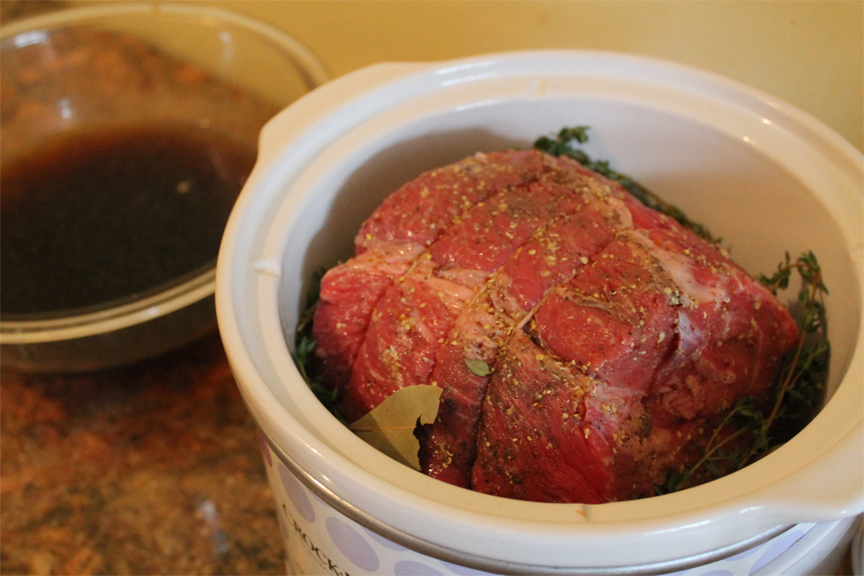
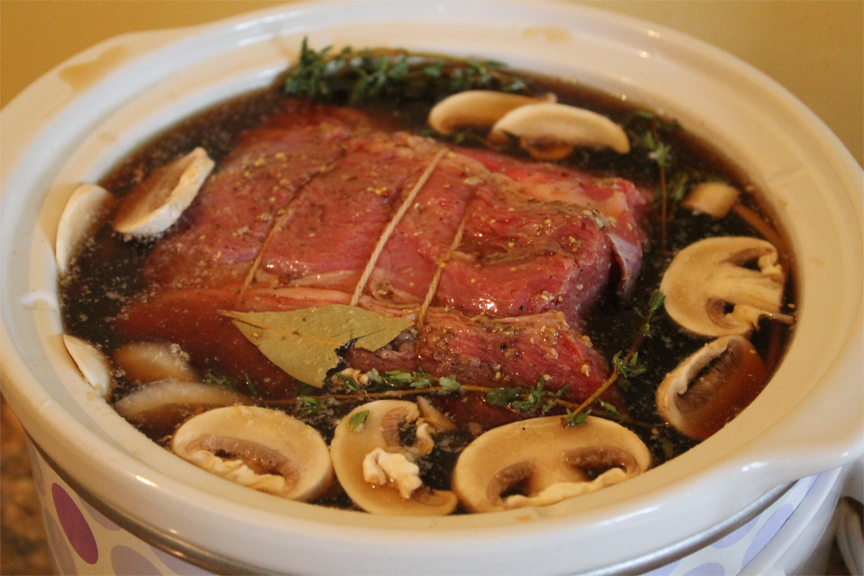
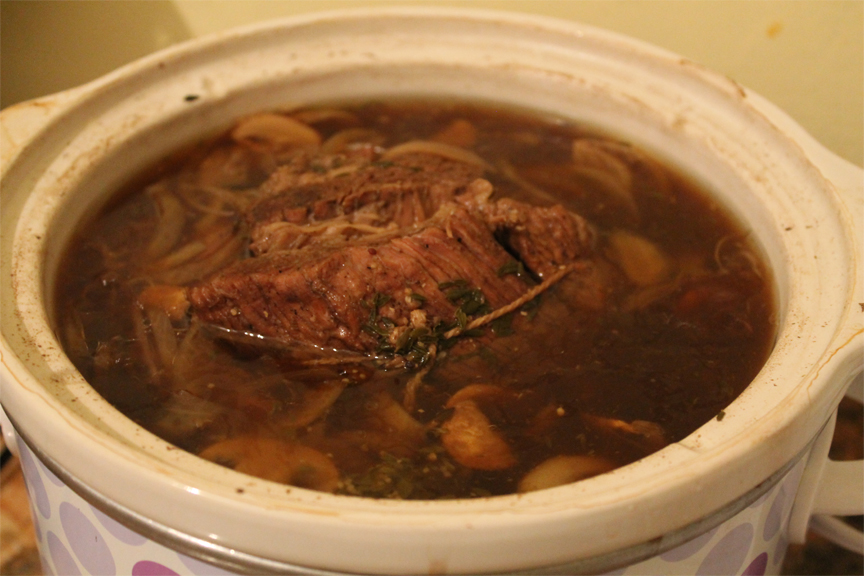
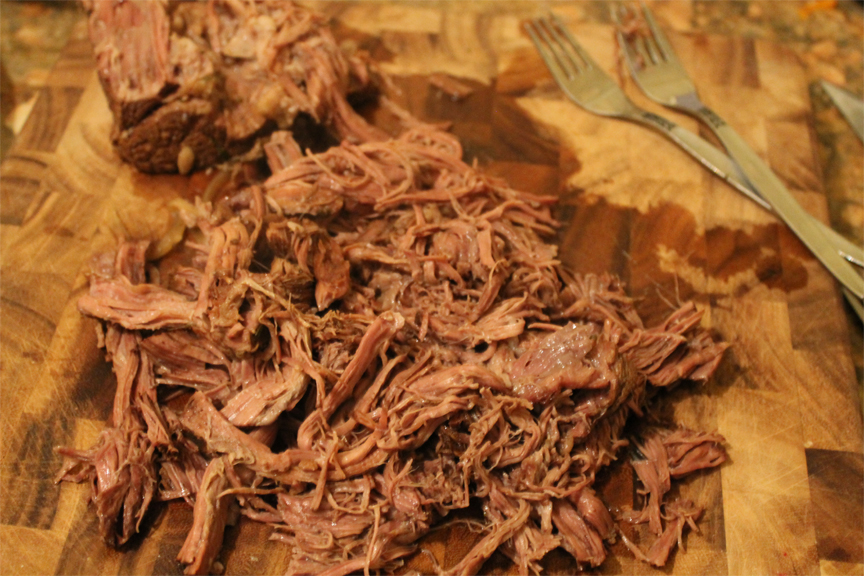
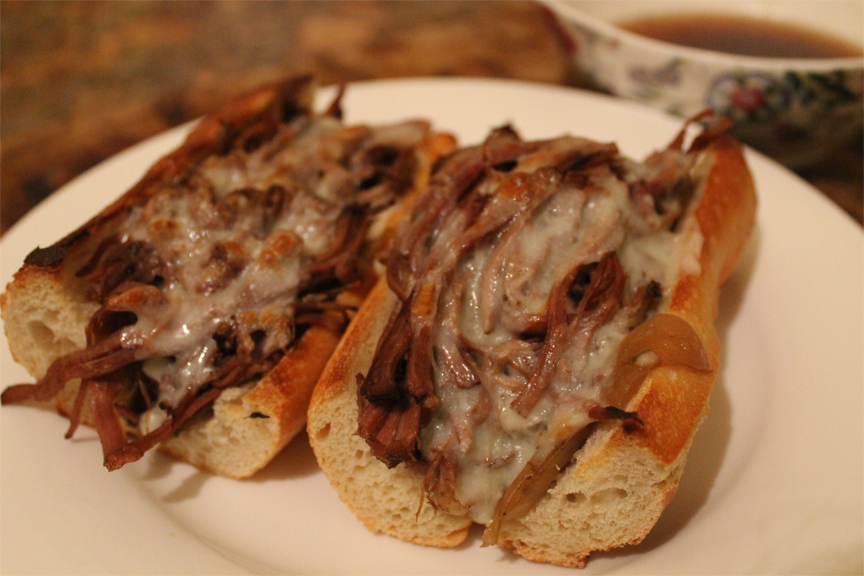
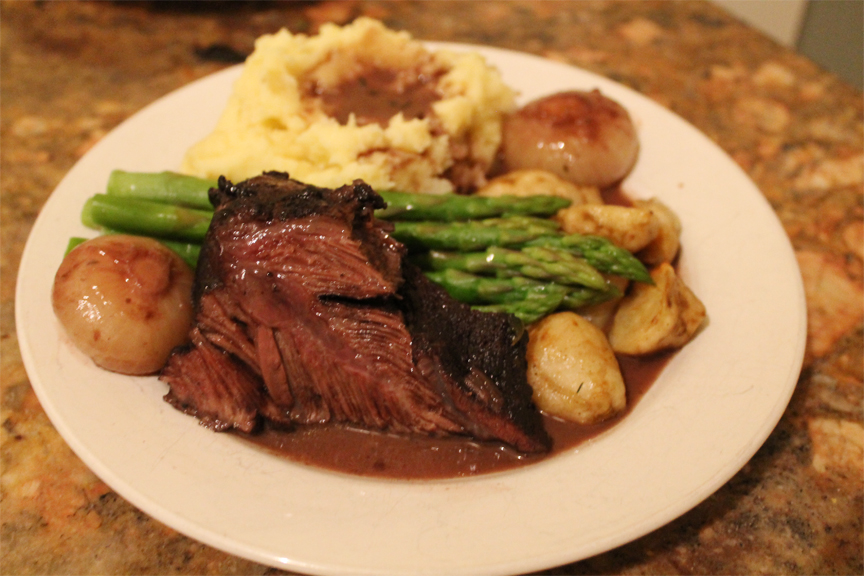
For the Italian week I assisted my Chef as the Sous Chef so I didn’t get to prepare the food for that week in class. But after class was over, Chef let me take home some extra beef cheeks so I could practice slow braising them in a red wine sauce at home.

Red wine stained and seared beef cheeks that are resting before braising, next to my prepared mirepoix.

Beef Cheeks

Braised Beef Cheeks served with Steamed Asparagus, Oven Roasted Jerusalem Artichokes, Braised Pearl Onions, Mashed Potatoes, and a Red Wine Reduction
Braised Beef Cheeks served with Steamed Asparagus, Oven Roasted Jerusalem Artichokes, Braised Pearl Onions, Mashed Potatoes, and a Red Wine Sauce.

And, last but not least, the vegan feast that my friend and I made last weekend for a charity event to raise money for a school in Ghana!

So. Much. Food.
Brown Rice, Oven Roasted Cinnamon Sweet Potatoes, Roasted Curry Chickpeas, Steamed Broccoli, Lemon and Lime Massaged Kale, Beet and Cabbage Slaw, and Carrot Slivers, with home made Tahini Dip and a Peanut Lime Dressing.

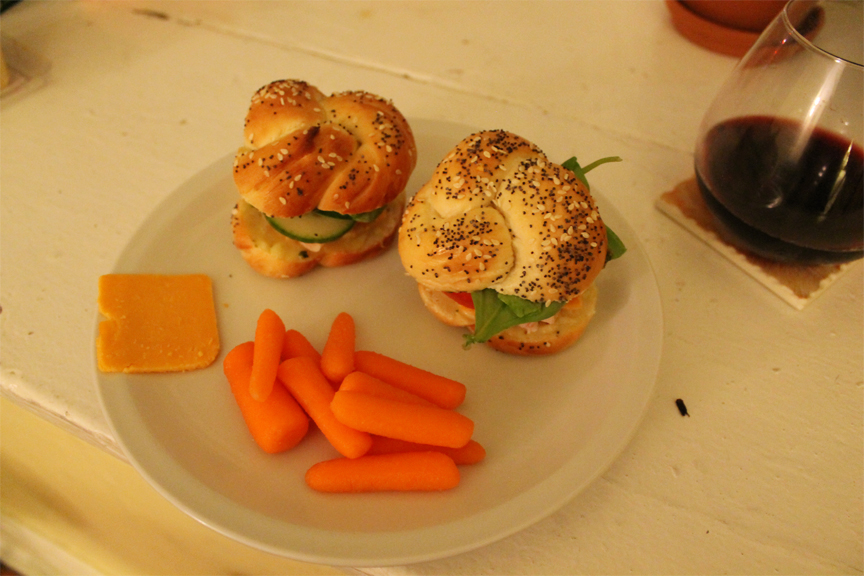
So, there you have it, my year in food!

Preparing a Roast from Roast

dip2

Since moving to the St. Clair West neighbourhood of Toronto, I pass Roast daily during my streetcar commute. I decided to visit this butcher shop and fine food vendor this weekend to see what they have to offer. Roast’s interior is clean and modern, and features a large selection of local and organic meat, packaged rubs and marinades, and a variety of made in-house dishes such as rabbit stew and chicken pot pie. After chatting with the friendly staff, I mentioned how I was hoping to prepare French dip sandwiches and was recommended a blade roast. This cut of meat comes from the chuck section of a steer or heifer. Since the muscles on this roast are used frequently by the animal, it is a tough cut of meat that is most suitable for long and slow cooking submerged in liquid. Perfect for making French dip sandwiches! I got a 1.47kg roast (just over 3 pounds) for $19.00/lb.

dip3

For this recipe I used my mom’s technique that she uses to make pot roast. First, I thinly sliced an onion and some mushrooms, smashed a couple cloves of garlic, and placed them in the bottom of my slow cooker.

dip4I prepared a beef bouillon cube in three cups of hot water and added in a quarter cup of low sodium soy sauce and a dash of Worcheshire sauce. Next, I seasoned my blade roast with salt, pepper, and dijon mustard before placing it in the slow cooker.

dip5

I poured in the beef stock, added sprigs of thyme and a bay leaf, and set the crock pot to high.

dip6

Seven hours later the meat was super tender and falling apart beautifully.

dip7

To make the sandwiches, I cut up a baguette that I got from Pain Perdu before lightly toasting it in the oven. I strained the mushrooms and onions from the jus and shredded the roast.

dip8

When the bread was nice and toasty, I piled on the meat and vegetables, topped with provolone cheese, and placed  into the oven to broil until the cheese was melted.

dip9

dip1

Overall, I found preparing this meal was very simple and if I were to sell this sandwich in a restaurant I would charge $14.00 (for two, as pictured). This dish could be served in a fast paced restaurant if the meat was prepared in advance by slow roasting overnight.

Let’s Boil Some Eggs!

“Probably one of the most private things in the world is an egg until it is broken” – MFK Fisher

eggs1
Just me and a whole bunch of eggs! (Oh, and my “key”, some sprigs of thyme, which I always have stocked in the fridge).

During my fourth and final year of university at UofT I was lucky enough to be a part of a seminar class based on the intersection between food and literature. The class was called “Cook the Books” and was quite unique as it included a cooking component, where we worked together in groups to prepare a menu based on our readings, and worked with Chef Joshna in the Hart House kitchen to prepare this meal for our entire class. It was through this class that I first became familiar with the work of MFK Fisher by reading her book based on the creation of wartime meals entitled “How to Cook a Wolf”. This excellently crafted mix of storytelling and practical instruction left a big impression on me in terms of the role of the food writer to inspire both the imagination and the appetite. Fisher dedicates an entire chapter to egg cookery, or as she calls it, “How not to boil an egg”. She discusses two different techniques for hard boiled eggs, one that I am familiar with and use often, and another I have never tried before. I wanted to explore her two strategies and see if I could adapt them to produce the perfect soft boiled egg.

For the first technique, MFK Fisher explains:

“Cover the egg with cold water in a little pan. Heat it briskly, and as soon as it begins to bubble, the egg is done. It will be tenderer than when started in hot water, which of course makes the part nearest the shell cook immediately, instead of heating the whole thing gently”.

Since reading this book a few years ago, this is the technique I have since adapted when making hard boiled eggs: bringing the water to a boil followed by taking it off the temperature and allowing the water to cool to room temperature. Perfect hard boiled eggs every time! For this egg-speriment (I’m sorry), I wanted to try both techniques with three eggs each. For this method I would remove the first egg as soon as the water reached a boil, the second at the 3 minute mark, and the third at 5 minutes.

eggs2

To begin, I used a large pot filled with 6 cups of water, a teaspoon of salt, and a teaspoon of rice wine vinegar just to add seasoning. I placed the eggs into the water straight from the refrigerator, put the pot on to high heat, and waited for it to come to a boil.

eggs3

In the meantime, I prepared my ice bath, and as a boil was achieved, off went the pot from the burner and in went the first egg into the ice cold water. I continued this process for the 3 and 5 minute eggs. As soon as the eggs were cool to the touch I began to peel them in a bowl of cold water. This proved to be quite a difficult process! The first egg was so soft and the shell was so difficult to remove that it broke open while still in the water! The yolk was soft and runny, but so was the white. Obviously, straight from the boiling water did not produce the best result. The 3 minute egg was also very difficult to peel but had a nice creamy yolk, while the 5 minute egg was the easiest to peel and its yolk was slightly more solidified. I think I had such difficulty peeling my eggs because they were too fresh, having bought them from the grocery store just two days prior.

eggs4

eggs5

MFK Fisher describes the second technique:

“[Another] fairly good way is to drop the egg gently into simmering water, first running cold water over it so that it will not crack, and then letting it stand there in the gentle heat for whatever time you wish. It will cook just as fast as if the water were hopping about in great bubbles, and it will be a better-treated egg, once opened”.

I have never tried merely simmering the eggs before. I have tried the crazy high rolling boil technique however, and I usually end up with over cooked, sulfur green yolks. Yuck! Using the water that I had previously boiled, I brought it up to a simmer, gently placed in my three eggs and set my timer for 7 minutes. I removed an egg at the 3, 5, and 7 minute mark, placing each in the water bath before proceeding to peel away.

eggs6

Once again, the 3 minute egg was impossible to peel! Maybe if I were to simply serve it in an egg cup with the top cracked off it would be acceptable, but peeled? Not happening. For the 5 minute egg, peeling went well, and, wow! Perfect! The white was completely cooked, although still tender, and the yolk was just beautifully runny and silky smooth. At the 7 minute mark, the yolk had already begun to solidify a bit beyond the point of soft boiled, although it was still a mighty fine egg. I believe this technique could be used for larger quantities of eggs as the water is simmering gently and not knocking them around too much. However, it still might be best to simmer the eggs in batches so to reduce the risk of breakage.

eggs7

So, my verdict for the optimal soft boiled egg? Bring seasoned water up to a gentle simmer and cook your eggs for 5 minutes. The result: a perfectly gooey center. Thanks MFK Fisher, you really know your eggs.

eggs8

Cozy Cream of Cauliflower Soup

cauli1Two years ago I was living in the Annex in a small one bedroom apartment that I had not-so-affectionately named “The Cave”. Inside this small apartment there was an even tinier kitchen, which I often referred to as the “coffin”, because the floor space was the approximate length and width of my body if I were to lie down and mummy cross my arms against my chest. It had a stove, a sink, almost enough counter space, and a fridge that couldn’t even open fully without hitting the opposing wall. Despite all of it’s shortcomings, I still utilized that kitchen frequently, and that was a good year for me in terms of experimentation. It was in this kitchen that I concocted all sorts of salads: roasted beets paired with blood oranges and spinach, my first ever Nicoise salad which soon became one of my favourite things to make and perfect. That year my parent’s bought me a crockpot for Christmas, and I was away making turkey soups, and slow cooking chicken thighs. My then boyfriend had been given a food processor from his parents that he never used, but I was more than happy to try making butternut squash gnocchi, along with blended soups of all kinds.

Teeny tiny kitchen, circa 2012
Teeny tiny kitchen, circa 2012.

I was particularly happy with a cream of cauliflower soup that I came up with, as it was one of the first recipes that I created entirely on my own. In the original recipe I used green cauliflower, chicken bouillon from a stock cube, homo milk, onion, garlic, sage, butter, parmesan cheese, and a touch of freshly ground nutmeg. I remember serving and eating this with a friend and we both couldn’t stop talking about how good it was. I recently revised the recipe, and in this updated version I used my own chicken stock from scratch, my own blend of half and half instead of using homo milk, added in a potato for some extra smoothness, used thyme instead of sage, and keep with the addition of parmesan and nutmeg. The result? Even better than before!

cauli4

cauli5

I started my cream of cauliflower soup by making the chicken stock. The butcher next door was unfortunately closed on this gloomy sunday afternoon, so I used chicken wings from the grocery store to make my stock. This meant the stock was more expensive, but I made sure to remove the meat from the bones to keep for later after boiling them for an hour.

cauli6

I returned the skin and bones to the water along with my mirepoix to simmer for a couple more hours. My mirepoix contained 1 medium onion, 3 celery stalks, 1 large carrot, 2 cloves of crushed garlic, 2 bay leaves, and a bouquet garni of fresh parsley and thyme.

cauli8

While that was simmering away for the next two hours, I made sure to skim it regularly and it reduced quite a bit. I also prepped my vegetables for the cauliflower soup by chopping up 1 large potato, 1 medium onion, 1 large head of cauliflower, 2 cloves of finely diced garlic, and 5 sprigs of fresh thyme.

cauli9

cauli10

Once the chicken stock had finished simmering, I strained the it and got around 5 cups to be used in my soup. I then made my own half and half by mixing half a cup of 2% milk with half a cup of 35% heavy cream which would be blended with the vegetables in the food processor.

cauli11

cauli12

Next, I sautéed my onion and garlic together over medium heat until the onions were translucent. The potatoes and cauliflower were added to soften a bit before adding the chicken stock and thyme, and bringing everything to a boil. Once boiling, I simmered the vegetable for about ten minutes, until they were soft enough to be blended in the food processor.

cauli13

Next came the fun (and noisy!) part. Working in batches, I ladled in the cauliflower, potato, and stock into the food processor. I added some cream, shredded baby parmesan cheese over it, grated nutmeg, and salt and pepper to season. I pureed each batch of soup until it was nice and smooth, which took about 25 seconds or so.

cauli14

cauli15

cauli16

I returned all of the creamy cauliflower soup to the stove, to bring up the heat again before serving. To garnish, I shredded a bit more of the parmesan cheese on top with a small sprig of thyme. If you wanted, a big bowl of this soup with some pumpernickel croutons would be a special touch on a cool winter’s eve.

cauli17

Precious Preserved Pears

My mother’s grandmother was a tobacco farmer out in Brantford, Ontario, and although I never met her, my mother is full of stories about her amazing cooking and baking. She ran a bit of a homestead, growing many of her own fruits and vegetables right on her land. She may have passed before my time but she left behind jars and jars of canned pears, which my family and I continued to eat for years (a testament to her skills at preservation!). The jars of pears were kept in the cool darkness of our basement, and as the years went on and the pear reserve dwindled, they became sacred in a way. Here were these jars of preserved life; small monuments to attest for my grandmother’s existence, providing continued nourishment for her family long into her afterlife.

Brandy Pear Ingredients

Drawing inspiration from my grandmother’s perfectly preserved pears, I wanted to attempt the canning process myself, but with a slight twist. Her recipe was simple and traditional — just the humble pear preserved in a simple syrup. Now that fall has certainly settled in, I find myself craving baked goods and warm cups of tea, but how to translate that to pears? As I was rummaging through my cupboards looking for inspiration, my nose detected this amazingly rich and spicy aroma which turned out to be a homemade chai blend that my boyfriend had concocted the winter before. So I decided to experiment. I would make one batch of pears that were slightly more traditional with a lemon, ginger, and cinnamon syrup, and another batch with an orange syrup infused with the chai spice. Oh, and did I mention both would be spiked with brandy? Because, why not, right?

Boiled Jars

Having never preserved anything before, I started the lengthy process with a sense of fear in my heart. Fear is not an over exaggeration. As I set up my jars and prepared my towel lined canning station, I realized that my pot was too small to entirely cover my jars during the boiling and sanitizing process. The internet gods mentioned that I needed at least an inch of boiling water above the lids. Would my short and chubby pot suffice? Or would I be unknowingly preserving tiny batches of botulism to be given lovingly to family and friends come the holiday season? Several semi-frantic calls with my mother later revealed that my pot would be fine as long as I filled it up to the rim of the jars and kept the lid on to create steam. Thanks mom!

Orange Zest

After boiling all of my jars for about twenty minutes each, I took them out of the pot with my sterilized metal tongs and placed them upside down on a towel to dry. The next step was to process all of my pears. Since I didn’t want them to discolour while they were waiting to be boiled, I created a few water baths for them, spritzing a bit of orange juice in bowls of cold water and making sure to reserve the orange peel to be used later in my syrup. I then started to wash, peel, and quarter my eight pounds of pears. This took a long time!

Pear Processing

Ginger Lemon Cinnamon Syrup

After all the pears were nice and settled in their water baths, I started working on my first batch of syrup. For this I thinly peeled and sliced a knob of ginger, peeled the zest of a lemon, squeezed the juice into a measuring cup (I got just over a quarter of a cup) and topped it off with water until it was a full cup. After pouring this into a large pot I added another cup and a half of water, three cups of sugar, my ginger and lemon zest, and two sticks of cinnamon. The syrup needs to be brought to a boil and then simmered for about ten minutes before adding the pears. After the pears have been added, it is then brought back up to a boil and the pears only need to be in there for about five minutes, because any longer and they start to go soft.

Preserving Pears

The pears are then placed into the jars, and a quarter cup of brandy is added to each. I topped them up with the remaining syrup and screwed on the lids. I made sure not to do it too tight because they are going to be put back into the giant pot of water, boiling for another twenty minutes, and the built up pressure needs to be released.

Pouring Syrup

For the orange and chai spice batch, I followed the same basic procedure. I peeled the zest off of another orange, and squeezed the juice into a measuring cup. I got about a half cup of juice and topped it off with water until I was at a full cup. I added this to my pot, along with another cup and a half of water, three cups of sugar, the orange zest from two oranges, a handful of star anise, and the chai spice blend secured in a tea ball. My chai blend consisted of cardamom, cloves, cinnamon, and a bit more star anise.

Orange Chai Brandy Pears

After boiling the pears in the syrup, placing them in their jars, adding the brandy and syrup, and boiling for an additional twenty minutes, all was successfully preserved! After leaving them on the counter for 24 hours, I tightened the lids and then placed them in the darkness of my cupboard. I can’t wait to try them in a month from now once all of the delicious brandy and syrup has been absorbed, either on their own, or with some vanilla ice-cream.

Fresh Start

Hello!

I’m Katrina, nice to meet you, out there, whoever you are! This is what is known as the precursory First Post, which often strikes fear into the hearts of those trembling apprehensive types just starting out in the blogging world (a.k.a. me). I’ve decided to finally start a blog after years of lurking in the shadows of the internet, and a food blog at that! Yep, yet another drop in the massive food blog ocean. How will mine be any different? Well, I haven’t really gotten that far yet in the whole planning process… But! It will start by tracking my journey as I embark off to Chef School this week, which is tremendously exciting to the point of me having to stop and ask myself: “Wait. This is actually happening?”

It sure is! Here, let me tell you a bit about how I got to this point. About two years ago I graduated from the University of Toronto with a Specialists Bachelor’s Degree in English Literature. Which basically means I read sososo many books, more books than I had to in order to achieve your average ‘ol english degree. Why did I do this to myself? Because I’m obsessed with books! And writing about books! Particularly Canadian literature, which I love and adore and focused on for much of my time in school. After graduation, I decided to take a publishing course, because, well, it seemed like the obvious choice. If you love Canadian literature, why not work in the Canadian publishing industry? But that’s not exactly how things worked out. I finished my course, got my diploma, and landed an internship. Sounds like everything went according to plan, right? Well, the internship was at an educational publishing house, and I was doing a lot of emailing and spreadsheets, and it was not at all like how I envisioned it. I was hoping to work with authors, editing and developing manuscripts, or working with magazines, editing and developing content. Unfortunately, the only editing work I was getting was for accounting textbooks. So after feeling as though I had fallen off the proper track, I decided to take a break from the publishing world for a while. I took a job as a hostess at a vegetarian restaurant, and have spent the last year somewhat confused but slowly gaining perspective on what I really want in life.

So, you’re probably wondering what any of this has to do with going to chef school. Well, while I was at my internship, the one project that actually stirred my interest was working on the slideshow presentation for a chef training textbook. Watching the demonstration videos and seeing what the course was all about got me super excited! I would think to myself: “Oh man, I wish I was the one actually doing the cooking instead of just sitting in this windowless box watching someone else do it!” I guess you could say that was when the light bulb moment occurred, and I told myself that I should just go for it.

Besides books, my other true love in life has always been food and cooking. As a kid I would take my mom’s cookbooks and make plasticine recreations of the recipes, I was all over my EasyBake Oven, and I would even sneak down into the kitchen in the wee hours of the morning to experiment while my parents slept. Some experiments were successful, like the time I made a beautifully browned Irish soda bread for St. Patrick’s day, and others… not so much, like when I attempted to make caramel without a candy thermometer, horribly burnt the sugar on the bottom on the pot, and hid the evidence in the cupboards, only to be found by my dad months later! I took all of the classes that involved cooking in high school, I cooked in the itty bitty kitchens in residence to avoid the horrible meal plan food, I even took a fourth year seminar on food literature which had a cooking component to it where we got to prepare a meal for our class in the commercial kitchens of Hart House alongside of Chef Joshna (my group made a four course Mediterranean inspired meal which included hand made gnocchi and lemon soufflé for dessert). For me, going to chef school just seems like the next logical step.

I dream of being able to combine my love of books, food, and writing into one big happy, creative, and slightly eclectic career one day, and by writing this blog I hope to trace this journey as it begins to unfold.